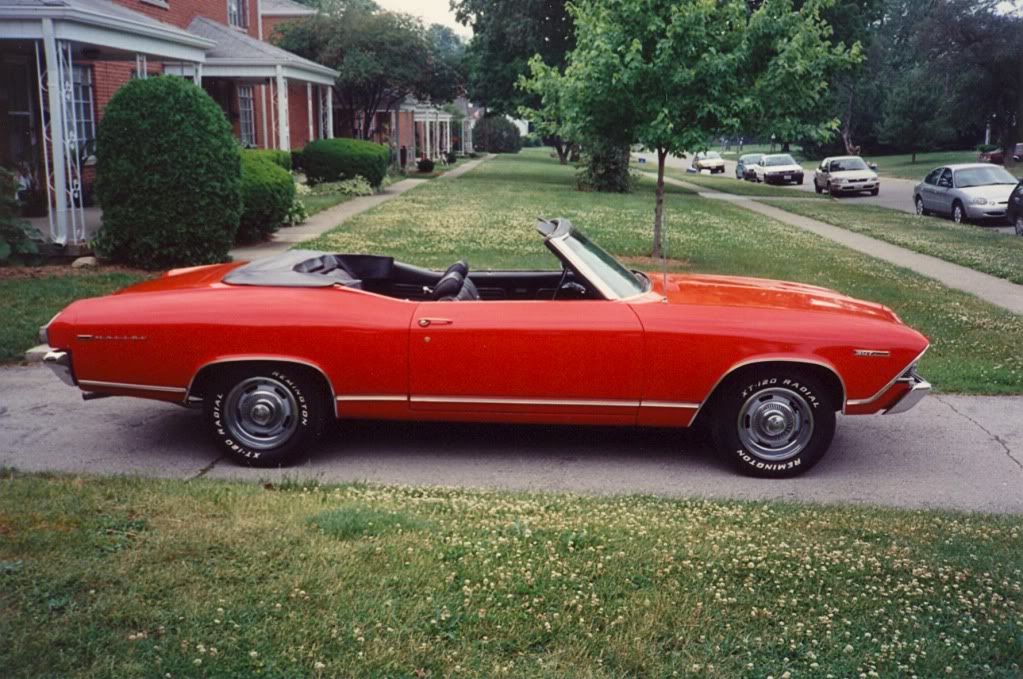
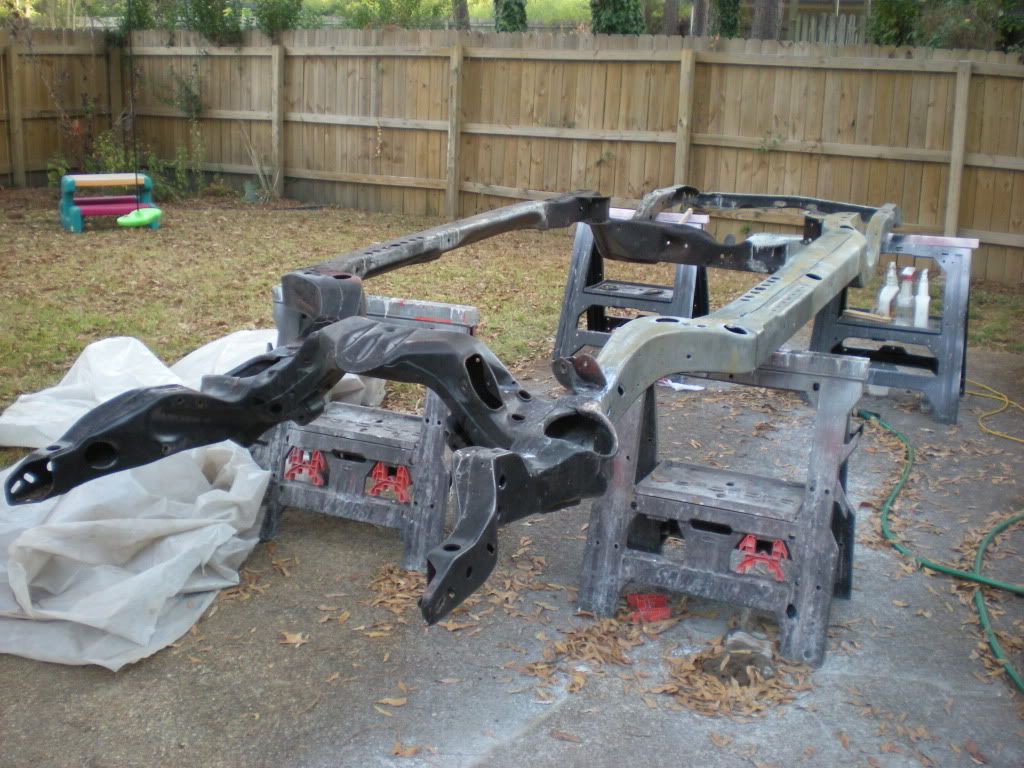
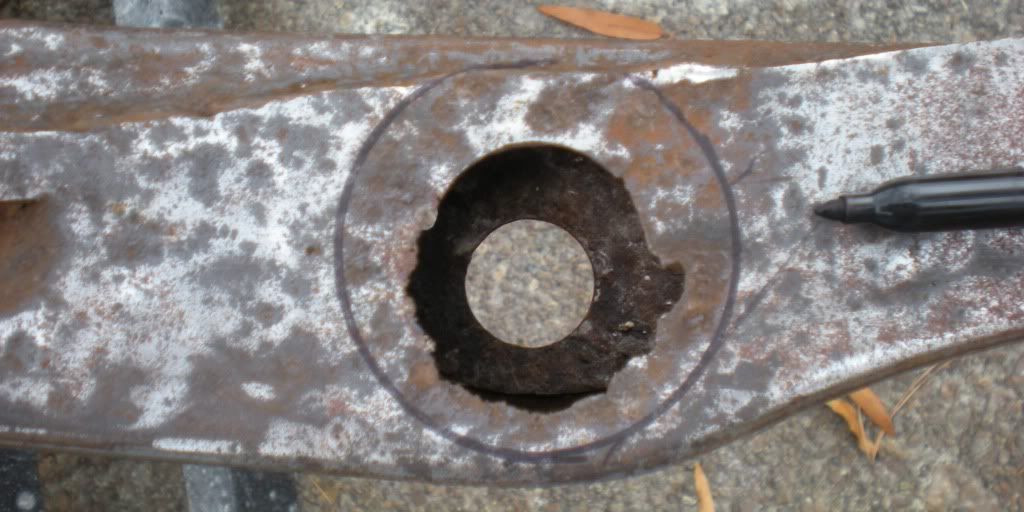
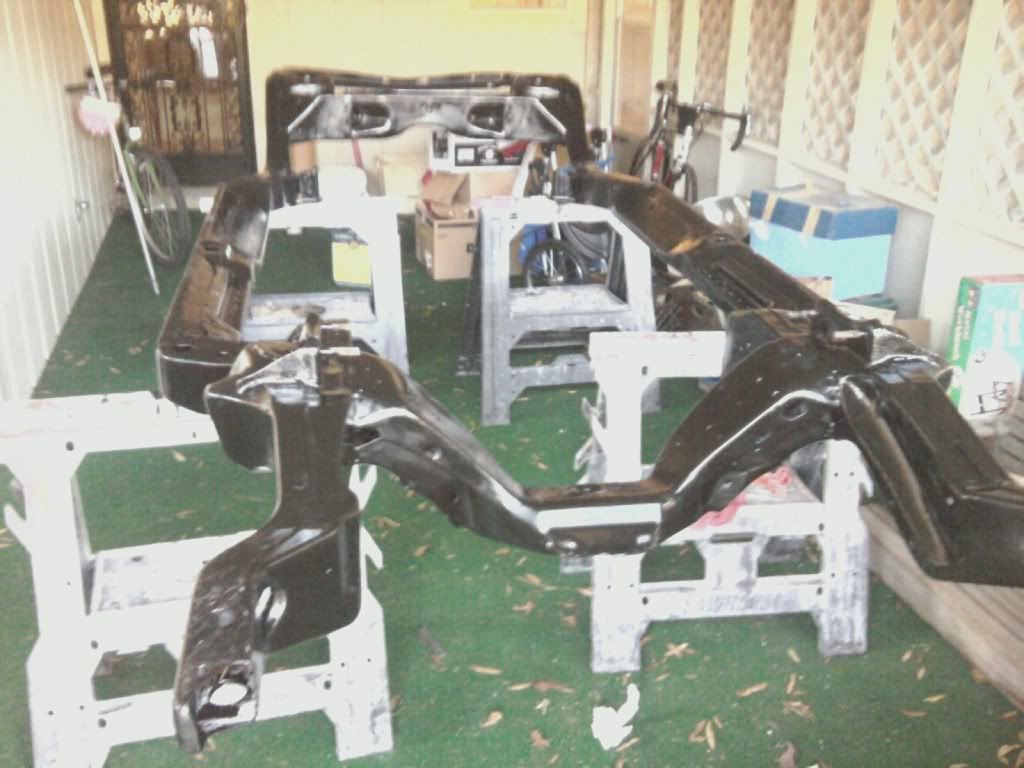
Team Chevelle banner
1 - 20 of 248 Posts

Andy69

· Registered
Joined
·
18,812 Posts
Discussion starter · #2 ·
Today I got the door skins mounted and the doors bolted up, and next I'm going to get the front fenders done. I hope to have it ready for paint in the fall. We have a full work schedule this summer including the Confederate ironclad CSS Georgia recovery and conservation, during which I'll probably be on site for 6 months, so I don't know how much I'll get done.

Just as a brief thread drift, here's our report on the initial survey of the ironclad in 2003
http://sav-harbor.com/Cultural Resources/CSS_Georgia_Site_Investigation_Report.pdf
 
Discussion starter · #3 ·
some back story:


This project has been going on for a number of years now, but I thought a thread would be appropriate. I've owned the car since 1997. I bought it in Columbus, Ohio, and it's a former West Virginia car. Here it is in 1998, just after redoing the suspension with a kit from P-S-T and HD springs, and front power disc brakes.

Image


This was I think the last time my daughter rode in it, it was spring 2006, iirc. I discovered in July of that year that it had a considerable amount of rust that made it unsafe so I decided to take it apart to fix it.

Image


Example of the rust. Both floor braces are rusted through.

Image


So, new floors and braces, and toe kicks, completed December 2006.

]
Image


badly rusted trunk floor. someone along the way thought that filling holes with bondo fixed the rust.

Image


The inner and outer wheelhouses were rusted pretty badly. At the time, the convertible WH panels were not reproduced, so I had to get a set of coupe panels, cut off the bottom part and section it on to the existing panels.

Image


Image


The quarter panels were brazed on patch panels, and of course warped because of the heat, so the person doing the work used bondo to make the panels straight. The result was over 1/2 thick in some places.

Image


so, new quarters in 2007

Image


Image
 
Discussion starter · #4 ·
Image


Image


The usual cowl area repair. Again, at the time (2007), there were no repair panels available, so I made my own.

Image


2008, pulled the body off to repair the front body mount boxes.

Image
[/QUOTE]
 
Discussion starter · #5 ·
The project was put on the shelf for a time in 2009 or so as I was traveling a lot for work and working on other things, including buying a new house and moving. The cars were left at the old house for over a year until we sold it as the new house did not have a garage, only a car port.

In fall of 2010 I lugged the frame over to the new house and started working on it.

Image


It needed some repairs, not the least of which were rust-elongated mounting holes:

Image

Image


a couple of months of spare time and it was painted

Image

Image

Image


picked up a nodular limited slip rear end from a 68 GTO with 3.55 gears from a buddy FOR FREE (just GET IT OUTA HERE!). It replaced the 2.89 peg leg that was in it.

Image


decided to go the pro-touring route with the suspension build.

Image


used the same engine and trans combo that I installed in 2005 - 330 hp 350 sbc backed by a 200-4r 4 speed auto with overdrive. The steering box is from a 1992 Caprice, it's got a way quicker ratio than stock.

Image


building up the suspension. Boxed stock lower arms, UMI adjustable uppers, both with poly bushings, the Eibach ProKit lowering springs, stainless hardware where ever I can, and a Stage 2+ kit from SC&C for the front. The fully adjustable front upper a-arms and tall ball joints will eliminate the crappy suspension geometry that 60s and 70s GM cars are notorious for. I also have a C5 brake upgrade that I have yet to install due to having only 14 inch wheels as rollers.

Image
 
Discussion starter · #6 ·
2011, getting the body squared away and the firewall primed and painted

Image


Image


Painted the underside with bedliner

Image


and got the body back on the chassis, after 4+ years of being apart.

Image


Image


From 2010 to 2012, there was no garage at our new house. From 2010 to July of 2011, I was able to store the car and it's parts at our old house, which we had not yet sold.

The old place had a 20x24 garage which I had built in 2002.

Image


In May of 2012, I was finally in a position to start construction on the new home for my cars - 24x40 garage, double the previous one.

Image

Image

Image

Image
 
Discussion starter · #7 ·
Image

Image


then I could get to work again, lining up the back panels and doing some finish metalwork.

Image


As it stands right now, I'm in the process of stripping the remaining panels, priming them, and finishing some minor metal repairs. Once I get that done I need to reskin the doors and get all the panels lined up. Once that's done it's bodywork time - getting all the panels lined up and straight, spraying a sealer coat, then primer/surfacer, then blocking it straight. After that comes the color. I hope to have it ready for the spray booth by the fall of this year.
 
Discussion starter · #8 ·
update: fall deadline for color is looking iffy. I've got a busy summer. Kids and work come first, which is fine with me :)
 
Looking good Andy. It's going to be like a fine wine when finished.
 
Discussion starter · #13 ·
Baaa. Looks like the fall goal of being ready for paint is shot to hell. I'll be supervising dive ops continuously between July 15th and Christmas, mostly out of town. Maybe I could bring a fender or two and my wire wheels and work on them in my spare time :)

The good news is that at least one of these out of town gigs is some pretty interesting stuff with national historical interest. You might see my ugly mug on CNN come November :)
 
Discussion starter · #15 ·
OK, my goal for this winter is to get the rest of the sheet metal cleaned up and primed, and fit together, so that next spring I can start on the bodywork.
 
Discussion starter · #17 ·
OK, my goal for this winter is to get the rest of the sheet metal cleaned up and primed, and fit together, so that next spring I can start on the bodywork.
Got the fenders and header panel blasted and primed, now they need some filler work. Did the best I could on the dents with the hammer and dolly, but they still need some help.
 
Discussion starter · #18 ·
Some progress pics. As soon as I can finish off the filler work I'm going to install all the pieces and start lining everything up.
 

Attachments

Discussion starter · #19 ·
Starting to look like a car again
 

Attachments

1 - 20 of 248 Posts