Team Chevelle banner

72 Concours wagon project

199K views 1.1K replies 67 participants last post by  CBMU302  
#1 · (Edited)
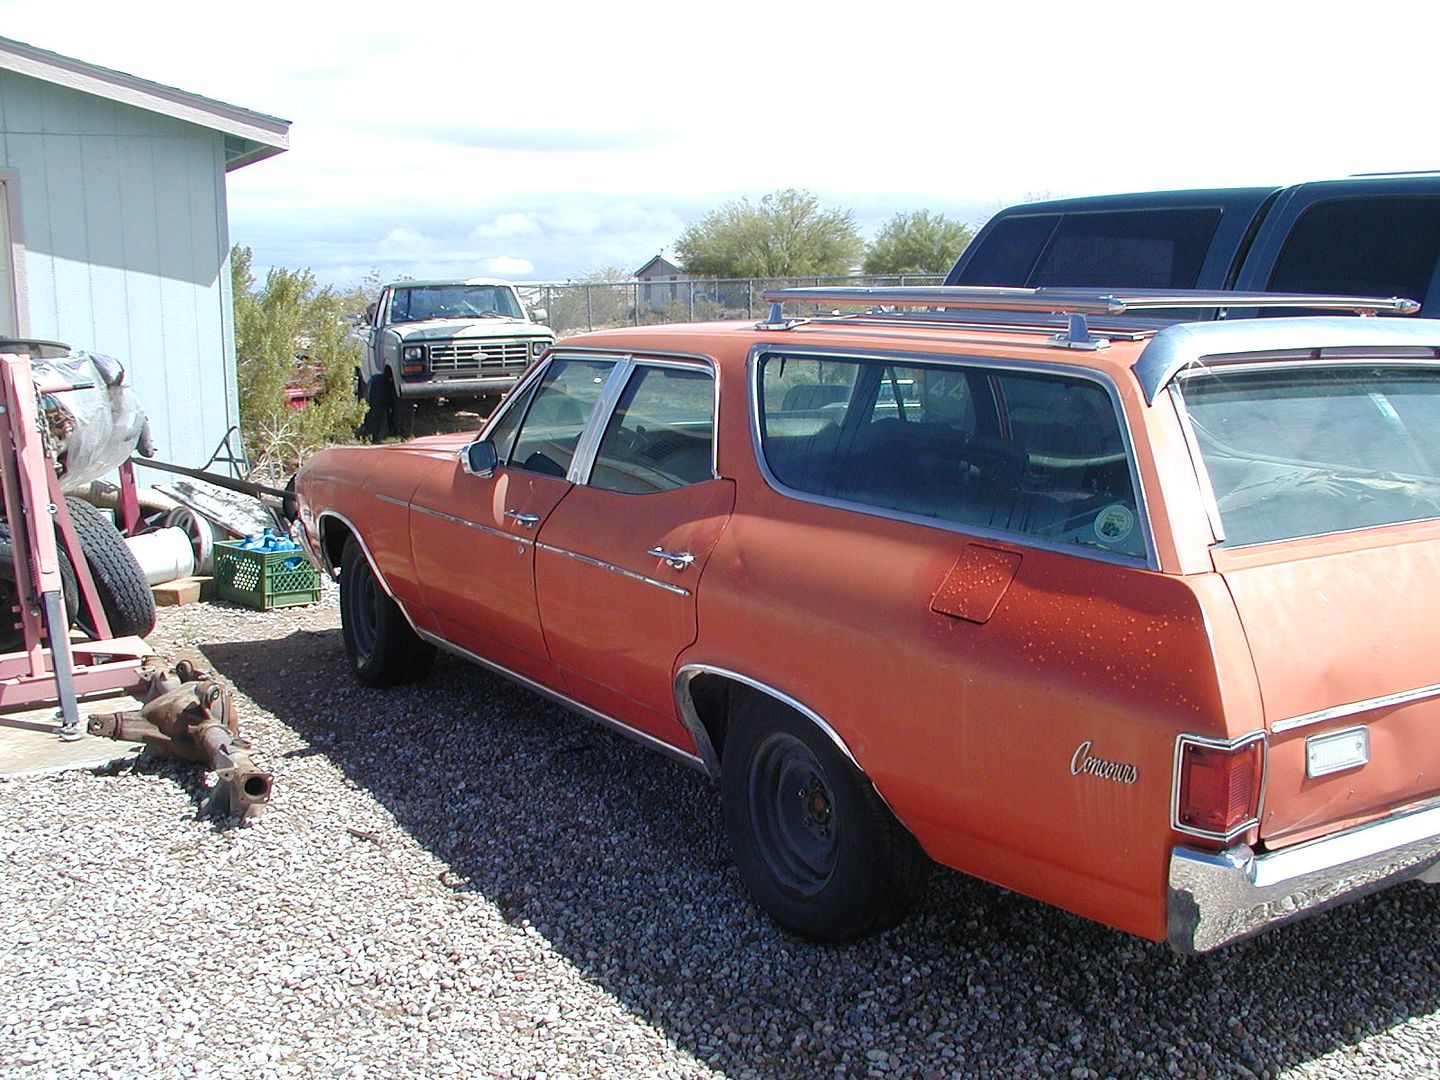
I purchased this wagon last month from a friend and member here, thanks Jeff. It appears to be in original condition, came with the POP, the wagon owners manual and dealers sales invoice. Speedometer shows 88593 and judging from condition and the length of time it has been sitting it possibly could be original miles. Original engine and transmission are gone so eventually it may get a mild big block. For now it will be powered by an LT1 converted to a carburetor and HEI with a th400 transmission.

Here is the wagon, it is the original color Flame Orange Metallic code 65. I cleaned up a small section to see the color better and I like it.

Image


Image


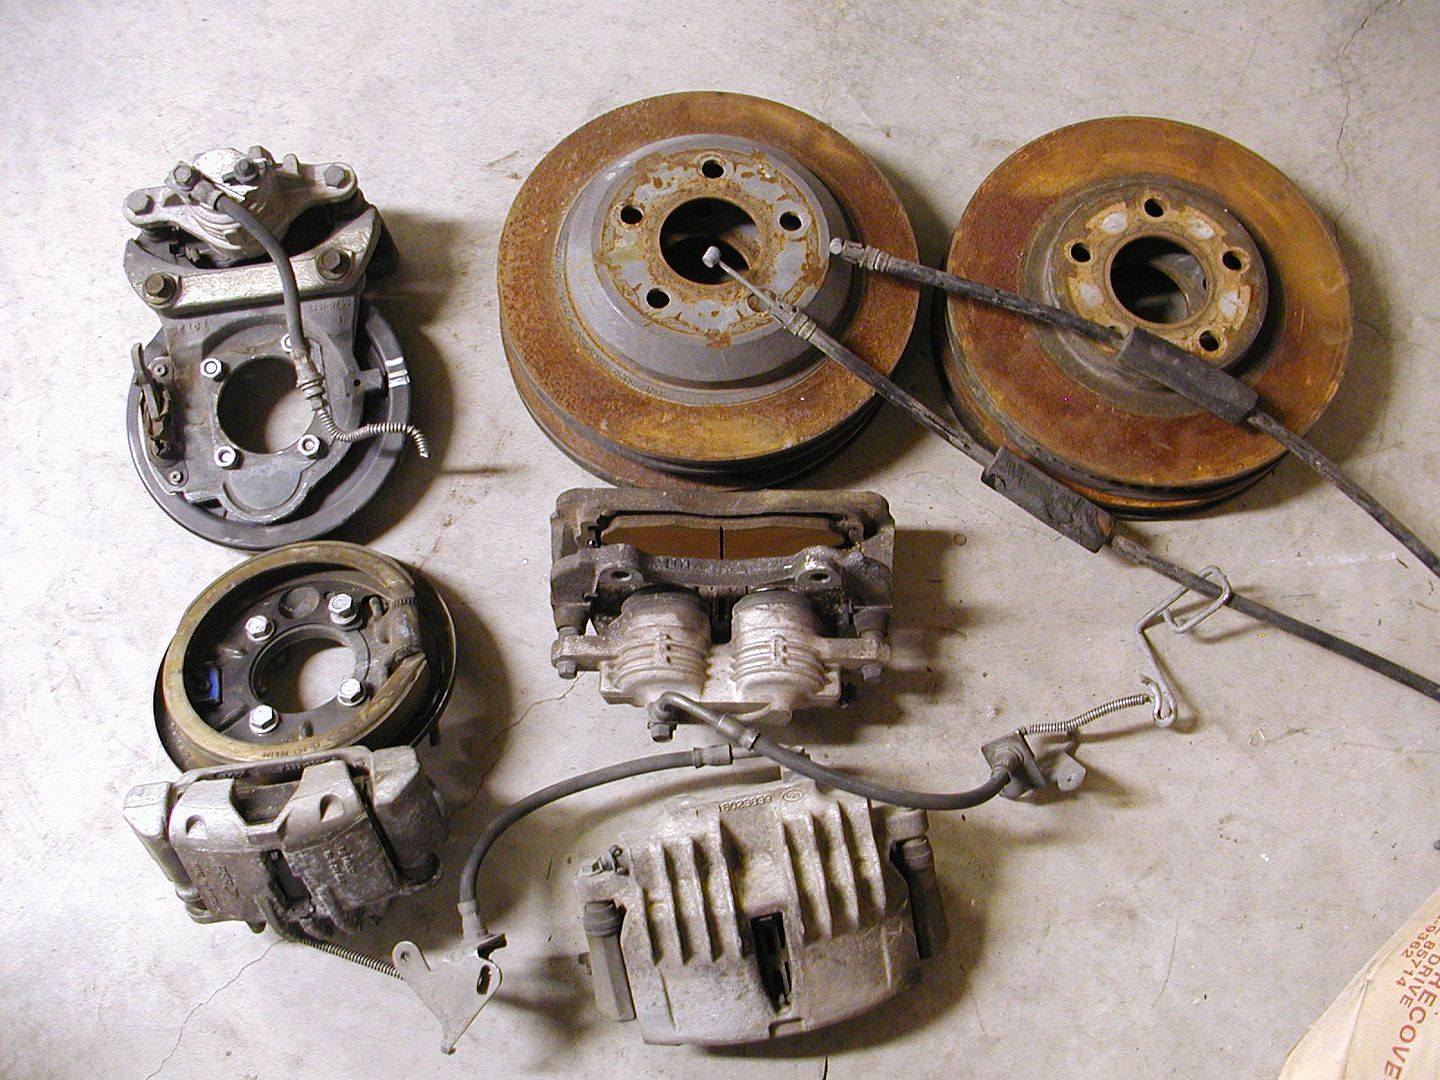
Although I am really anxious to get started on the project, I need to finish a customers 57 Bel Air before beginning on the wagon but the parts for the 4 wheel disc conversion were just purchased.

The brakes are from a 98 - 02 F body. I was surprised to see how large the front calipers and brake pads were, the rears are the same as the set installed on my Nova.

Image


Image


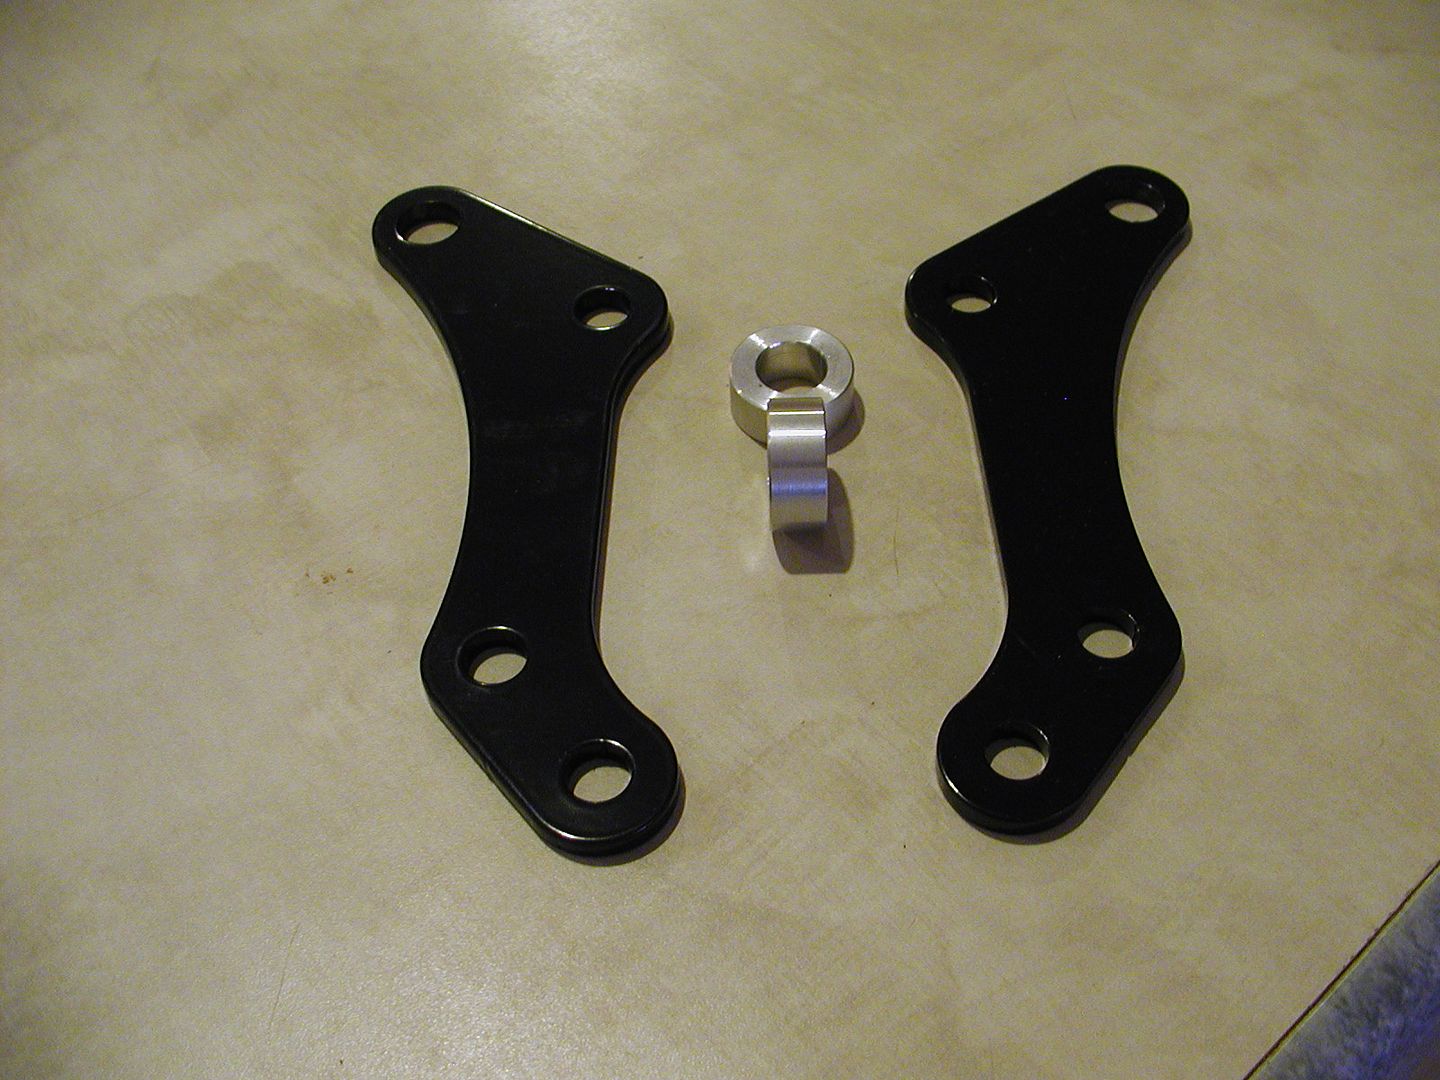
Church Boys Racing makes a nice set of adapter mounts that can be used with either factory drum or disc spindles. The drum hub is used with the Camaro rotor. If using drum spindles the spacers are not required.

Image


Rear brake install on the Nova

Image


Updates will be posted as progress is made. Any tips or suggestions from wagon owners will be greatly appreciated.
 
#120 ·
do you have the build list for the front break set up you are using. I looked up Church Boys Racing and did not see those brackets. I what year camaro rotors? I always liked the b-body spindle conversion to get the lower pivot point, and slight drop as well as the larger rotor. I am wondering which one is easier? did you finish the assembly? pics...
 
#121 · (Edited)
Pete CBR doesn't list the front brackets on the website. Call for ordering, Chuck will need to know if using drum or disc spindles. Best to say disc then it comes with the spacers and either set of spindles will work. The mounting bracket is the only part needed to buy besides the brake stuff from the 98 - 02 F body front, rear and the brake cables if possible.
I'll post details of the install as soon as I get that far, should be sometime next week.
 
#122 ·
LS rear brake install

Yesterday the mock up for the rear brakes began.

Image


Image


First step was to determine the thickness of the shim needed to center the bracket over the rotor. I have a .135" thick piece of aluminum that is used as a starting point. It can be seen in the first photo.

Then the backing plate mounted, the axle goes in and the abutment (caliper bracket) installed to check fit.

Image


The rotor has to fit flush on the axle flange and my experience has been that they do not. This little step at the radius of the hub keeps the rotor from going all the way on. I open up the center hole on the rotor enough to have it fit. IMO never alter the axle at this point. I have worked with 2 different brands of rotors and 2 brands of after market axles with the same results.

Image


From this point the difference can be measured and the shim thickness needed can be determined.

Image


On my 12 bolt housing .201" was needed on the drivers side and .184" on the passengers side. I made 2 shims from .187 plate steel.

Marked, cut out, drilled, cleaned and painted

Image


Image


Image


Image


The rotor is now more evenly spaced in the abutment

Image


Next step is to make the bracket to secure the parking brake cable.
 
#123 ·
Installed the completed rear in the frame tonight. Forgot how much fun it was getting all of the bolts in the holes :clonk:

Image


Springs, shocks and parking brake cables will be installed on Monday, I'm taking tomorrow off.
 
#125 ·
Not only am I taking the day off, but it will be a paid day off ;)
Had I been thinking I could have had you or Mike help get that off the saw horses and onto the jack :clonk:
 
#127 ·
The rear brake hoses and front calipers arrived today, still waiting on the rear springs.
I'm using the stock F body hoses at the rear calipers and the stock A body hose from the frame to the rear. The tabs to secure the hoses on the axle tube were cut off of the brackets that came from the brake donor car. There is a right and left bracket mounting to align the index points, the hoses are the same but mount opposite each other.
The stock 12 bolt lines were shortened and a flare nut from the donor car installed on the line before creating a bubble flare on the end to tie into the F body hose.

Image


Image


Image


Whoever coined the phrase "change is good" must not have built hot rods. Seems the simplest things often get complicated. I replaced the sheet metal cover with an aluminum cover with bolts that add support to the bearing caps. Seemed simple enough until the brake hose install...and the line wouldn't reach the frame. An adjustment had to be made to the bracket to locate the hose back in the stock position. A a piece of scrap metal left over from cutting out the parking brake cable brackets was used.

Image
 
#979 ·
Phillip,

I am currently doing this swap and wanted to ask one question :

Did you swap the backing plates to position the calipers toward the rear instead of the front ? I figure you did this to make the e-brake lever pull toward the front instead of the rear ?

I need to swap my backing plates around to do this. Seems like the easiest way to hook up the e-brake to the parking brake system.
 
#128 · (Edited)
My buddy Rob came over Friday and helped to swap the engine over to adjustable rocker arms. The L29 does not have the the traditional set up, just a special bolt that gets torqued to spec. This works well until you upgrade the camshaft, which has been done. The parts were installed, the lash adjusted and then we stopped for lunch. Thanks again my friend for buying me yet another lunch :beers:
After lunch we tackled the problem of a severe vibration in Robs sweet 66 Tempest Sprint. Still has the OHC 6 in it, manual trans soon to be upgraded to the optional 4 speed that was available for that model. Rob had already check a few things that had been suggested, but to me it felt like a drive shaft problem. The shaft was pulled and inspected, u joints were good, no dents or scrapes on the shaft but it has 1330 u joints and the inside retaining clips needed to position and secure the joint in the pinion yoke were never installed. Not sure what was holding the u joint from falling out, but apparently it was moving around. The vibration is gone and Rob is pleased. We also swapped out the points and condenser since he had new ones ready to go in. Friday ended on a high note but the weekend was ahead and would not be so nice.

I spent Saturday fixing crap that should not have needed fixin'.

First the engine was pulled out of the frame to remove the oil pan and timing cover. Didn't feel comfortable with the install of the gaskets and the distributor was off by 35°. Didn't know if it was stabbed wrong or something else was amiss. Also did not like the color of the oil when it was drained. Good news is everything inside was great, the distributor was installed off. On this engine the 35° would affect the running of the engine. The distributor is the cam sensor, the timing isn't adjustable with the distributor and the ECU assumes it is installed at zero for a cam reference position. $30 for gaskets, a couple of hours of labor but the peace of mind knowing it is all good was priceless.

For the cost of March Performance serpentine systems it sure didn't fit well. The alternator and power steering pump were way out of alignment. The alternator was not on the same angle as the other accessories. Had to make the mounting hole into a slot to move the alternator bracket to get it in align with the other pulleys. Also did some cutting and shimming of the power steering brackets to correct the alignment. It was twisted as well as being at the wrong angle. This system was supposedly designed to fit a big block, mine is no different than any of the earlier engines as far mounting points on the front of the block and heads. The fix would be simple for them to do, a little harder for the installer.

Next on the list was getting rid of some ugliness. Since the intake was removed Friday during the rocker arm upgrade it was a good time to remove some uneeded castings on the upper plenum, specifically the EGR and canister purge ports cast into the intake. I wanted to remove them but had reservations. Didn't want to ruin the intake without having a spare. Having no luck finding another upper plenum I dove in and and started cutting. Having access to a milling machine would have made it a lot easier. 2 hack saw blades, 3 cut off wheels, a skinned knuckle and smashed thumb later I got it looking pretty good. I'll take it to town tomorrow to have the holes welded up. After welding I'll smooth it some more, blend in some of the sharp edges and send it out for powder coating.

before

Image


Image


Image


This is where it is now, the 2 lower openings need to be filled in, the 2 upper are for the PCV and brake booster.

Image


By the end of the week the front suspension, brakes and steering may be completed. After that the installation the 2 fuel lines and the rear brake line.

Then it will be time for the hard stuff...removing the old paint in preparation for body and paint work to begin.
 
#134 ·
I'm doing fine Bill. Work is progressing, the front suspension, front brakes,steering and sway bar are all installed. Rear springs finally showed up so they are in and one of the parking brake cables has been modified. Headers are on and the fuel line, fuel return line and rear brake line are all installed on the drivers side frame rail. I'll post some photos this evening.
Some of the things keeping me from getting more done are the yard work here and a massive clean up at my rental house. The winter rains have produced a massive amount of weeds. The front yard and driveways are cleaned up but the back acre still needs to be done.
My renters of 2 years disappeared without notice leaving behind a mess of epic proportions. I do not think they ever hauled away any household trash. I found a pile 6' tall, 5' in diameter in the back yard. Most of the bags had deteriorated from the sun so it wasn't just picking them up and tossing in the trailer. Rotten food, used diapers and bugs of all shapes and sizes. We have all of that gone, made 2 trips to the landfill totaling 2820 pounds. The house is destroyed, fixtures broken, holes in the walls and floors, windows broken and half the back door is gone :confused: The ceiling has caved in from an apparent water leak they never told me about and there is old clothes and broken furniture throughout the house. It really should be burned down but I doubt the mortgage and insurance companies would like that.
Other than that life is good, how have you been? As soon as the intake is back from the machine shop I'll let you know. The rear end and quick ratio steering gear are both here when you are ready for them.
 
#135 ·
Holy Cow, Philip!
Nice work on the wagon, can't wait to see the pictures!
Soooo sorry to hear about your renters, what a mess. Let us know if you need help with some of the house restoration.
Mike and I got the wagon in my shop last Saturday. In an hour the front sheetmetal was off, and by the end of the day, the front end was stripped down to two frame rails and a crossmember. Bonnie and I will try to post some pics this weekend, maybe even start a build thread.
Rather than do any more hijacking, I'll send you a PM with a couple of questions I have about our wagon............
Bill
 
#136 ·
As promised some photos

Springs, control arms, new disc brake spindle and new brake bracket installed.

Image


Image


Not yet installed in this photo, a .009" shim on the lower bolt to align the bracket over the center of the rotor.
Image


Image


Image


Image


Image


Image


1 1/4" sway bar from a 77 F body

Image


Image
 
#137 ·
Fuel and brake lines. The stock rear brake line was cleaned, sprayed with clear engine enamel. It looks like new, same for the 5/16" canister line now being used for a return to the tank. The 3/8" fuel line is aluminum covered with steel armor guard to protect it. The filter placement is not final, it may go on the frame where the line is clamped about where the jack stand is.

Image


Image


Image


Image
 
#138 ·
Rear springs are in and after a little struggle the rubber bumpers were inserted into the raised brackets that wagons and El Caminos use and installed on the rear end housing. I placed the rubber bumpers in a shallow pan of boiling water so the insert part would be soft enough to push in. Tried many other ways with no success.

Image


Image
 
#140 ·
A photo of what it took to get the front springs in with the body off. I thought the BB would be enough weight...it wasn't.

Image


All the new MOOG steering parts were painted this time. The coating on the parts does not stop them from rusting.

Image


The tie rod sleeves are from UMI. Steel not aluminum, very well made.

Image


The steering gear is from a 96 Caprice with a 9C1 package. Quick ratio and a very good feel. It is stiffer than both the Jeep and Z28 gears.

Image
 
#141 ·
Thanks Leo. The new look will wear off once it is running but the parts should last for my lifetime. I do not plan on having to replace any of it.
My buddy Rob is coming over tomorrow to help with the disassembly of the front sheet metal. Fenders and hood will be stripped to bare metal in preparation for body work and paint. Core support, inner fenders will be blasted and painted. AC/heater parts removed, cleaned and inspected. I have a new heater core to go in, it is aluminum. I was surprised when I took it out of the box.
 
#144 ·